The vertical Welding process is growing in demand due to the shortage of skilled welders as well as a recovering economy. Now there are plenty of jobs requiring vertical welding especially in building, power plants, shipyards, and oil industries. The reason is that laying those oversized workpieces horizontally for convenience is quite difficult. That said, let’s take a deeper look at vertical welding.
Vertical Welding Position
This is a process when you join two pieces together at a vertical angle below 45. The pieces are placed in a way that one side faces the sky while the other points downwards the ground. This kind of welding calls for skills and experience in order to produce quality welds.
For an ease welder, it’s nearly impossible to maneuver such heavy workpieces when joining them together.
Weld Directions
Vertical welding involves two main torch movements:
Vertical-Up
To make this easier for understanding, assume you are building a brick wall. Here, you must first build a strong base as you gradually move upright? In the vertical-up method, you start from the bottom and progress upwards thus making a strong base for the joint. This process is slow and patience is highly recommended. You gradually move a single step ago as you are combating gravity at the same time. Each part forms the base for the next in a process called the shelf.
Alternatively, a weaving technique can be effectively used when advancing up the joints. While welding, concentrate on the joint sides in order to give the weld puddle enough buffer time for cooling. Also, this protects the welder’s feet from the falling molten metal. Keep the electrode slightly uphill while maintaining a shorter arc in order to achieve better penetration. This makes it easier to position the electric arc on the joint you are creating.
In the end, you will have achieved better material penetration for your weld.
Vertical-Down
This technique is similar to vertical only that it starts from up and goes downwards. During welding, there are few points to keep. First, you are working against gravity and this accumulates the molten puddle into the work area. Staying ahead of the slag is the key here. The technique calls for continuous monitoring and setting the right amperage to prevent a burn-through on the material.
Most welders prefer this method for many joints with an exception of very thin workpieces. While you can apply any of the two techniques for welding, shielded metal arc gas is the most frequently used.
Stick Welding for Upright Joints
For many years, this has been the most used method for welding. This technique can be used to weld two joints with or without using filler metals and pressure. As long as the pieces are thermal conductors, you can use the method for making different joints. The process requires an electric arc to runs from the electrode through the material. The arc functions to provide better weld penetration, a reason it’s commonly used on thicker materials. In addition, the electric arc heats over rust and dirt making it ideal for renovation and building projects.
Whether you are looking to weld outdoor, or apply draftily, stick welding performs best. It works incredibly right in a wide range of materials. As an added advantage, stick welding is affordable and can be used on the AC and DC power supply. Despite the numerous rewards of this process, a significant downside restricts the use of this welding only to sheets less than 18-gauge. Its only ideal for thick metals due to high heat and great material penetration. For thin metals, you will end up burning through the material.
How to weld vertical MIG
Metal Inert Gas(MIG) is the easiest technique to use in welding. It requires less experience and beginners find it easy to pull off. While this is true, the same cannot be said for vertical joints. Welding vertical MIG requires not just skills but plenty of it. Metal inert gas uses an electric arc with filler wire. The constantly fed wire functions to melt and fill the gap. No molten is produced thereby making the process clean and comfortable.
While welding, most people use the vertical down process as gravity supports the process. Still, this may not be a good idea for thicker materials. The slag accumulates in the middle thereby weakening material penetration. Skilled welders prefer the vertical up process. Here, they work against gravity thereby making puddle positioning difficult. While this process is hard, it allows for better material penetration. Any expert will recommend you stick to the upside-down vertical process.
This movement enables one to weld end to end on the metal to be joined. This provides a solution to the slag problem and allows for optimum weld penetration to the filler metal for a solid joint. Only a few welders manage to create top-quality joints using this technique.
Daddy’s Tips: Read Detailed Review & Buying Guide of Best MIG Welders.
Tips for vertical stick welding
Get the right electrode
A vertical welding position requires one to withstand against the force’s gravity. You don’t go into battle with the wrong arms. Using the best electrode gives the right resultant joint. To get the right electrode, choose one with low iron powder. Too much or iron take a lot of time to cool when heated. Examples of such electrodes include the 7018 and 6010. Always the whipping technique for the AWS 6010 and weaving for 7018. Use 7024 when advancing vertically down.
Create Weld Shelves
Like I said earlier, use a vertical up position with only an exception of thinner metals. Despite being hard and time-consuming, vertical up movement yields quality results. Create weld shelves by joining a section of the material and gradually move to next. The pool formed from the previous weld act as a shelf for the resulting workpiece. Ideally, try to limit the pool to 1.5 for best material penetration.
Right power settings
Using high power can be a big mistake you need to avoid when stick welding. This leads to many problems such as undercutting and may end up affecting the quality of the weld. To avoid this, use low current and take breaks through the entire process. This improves your control over the final appearance and lowers the pool size. In the same line, lower the amperage setting to let the molten puddle freeze.
Safety First
During vertical welding, safety guidelines should be adhered to. They include;
Safety glasses– a large amount of spatter is produced during welding. Having a safety glass is significant for your eyes. Read, How to Choose Best Welding Safety Glasses.
Auto-darkening helmet– welding requires constant vigilant of the molten puddle to avoid accidents. It’s nearly impossible to switch lenses halfway the task. Since arcs are very bright, it’s important to have a good helmet to safeguard your vision.
?? True Color Solar Powered Auto Darkening Welding Helmet available on Amazon.
Steel toe boots – you must allow the slag to drip off before placing in the filler metal for ideal joints. Joining the spatter with the dripping slag exposes your feet to risk. Having steel boots will protect your feet from burning.

Flame resistant overalls and gloves –to create optimal penetration, you must maintain a short arc. This exposes you to arms to fire. Similarly, the heat combine with spatter exposes your body to burning risk. Overalls will help protect your body from spatters. Get Flame resistant overalls and gloves on amazon.
Vertical stick welding 6013
The 6013 electrode gives a smooth but medium penetrating arc during vertical welding. While you can get some long arcing in a flat position, the same cannot be said in a vertical movement. The long arc becomes a problem once you shift the gear to weld vertical. The rod aids a quite arc that is freely maintained with less spatter loss. Slag created from welding 6013 yields finely swollen bead contour. Its harder to operate 6013 despite producing less slag.
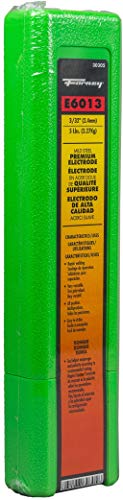
- The product is LB 3/32 6013 Weld Rod
- Easy to use
- All position welding, general purpose rod for shallow penetration or in poor fit up conditions
- Excellent wetting action, yielding smooth and flat beads with steady arc with either AC or DC
- Low spatter and excellent slag removal, virtually self cleaning in vertical down fillets
- Use on all types of mild steel where ease of operation and good appearance is required in all positions, ideal for vertical down welding
- Use for all types of mild steel fabrication
Best Rod for vertical welding
The 7018 electrode is the backbone of vertical welding. It works differently from other common rods such as the 7024, 6010, and 6011. It contains low hydrogen potassium making it ideal for steel plate welding. In addition, the rod is smooth and easier. 7018 has the capacity to deliver uniform and x-ray quality welds. This explains why the rod is preferred for the construction of ship hull, boilers, fabrications, and more.
Editor Tip: Welding Rod Sizes and Uses- Guide to Choose a Best Welding Rod.
While 6010 is good, it demands more skills during vertical welding. Only professionals can weld successfully using this rod. 6010 can also be used for vertical welding using AC as a power source. Do yourself a favor and use the 7018 rods for vertical welding
Overhead Welding
Overhead welding is quite challenging among the five main positions of welding. The reason is due to gravitational forces that keep pulling you down. For quality possible penetration, uphill welding is recommended. However, you can apply downhill welding when working with sheet metal that requires less penetration.
Being a complicated position, this type of welding is performed on the base of a joint. As gravity happens, metal deposits tend to concentrate on the plate. To counter this, keep the molten puddle limited. Once the puddle expands, allow the metal to solidify by removing the flame. Ensure the filler metal is sufficient for retaining enough puddles and adequate reinforcement to keep the metal from falling.
Overhead welding is compared to bricklaying. The welder makes a joint gradually from the bottom while moving a small section at a time. The welder repeats the process on top of each joint that was earlier laid. The newly formed joint serves as a foundation for where the next joint is created. For maximum results, it’s recommended to keep the rod uphill and maintain the arc short. Concentrate welding the edges of the weld first during weaving. Then, give a short break for the beads to cool before moving to the next joint. Avoid trapped slag in joints as they lower the strength of a joint.
7018 vertical up weave
Welding vertical with a 7018 electrode can be a frustrating learning curve. It’s never easy if you are a beginner. However, once you learn a few basics, everything becomes quite easy. Below are the basics for E7018 vertical up weave:
- Start by setting your machine on the right amperage, preferably low.
- Keep the rod uphill at an angle of 45 –degrees
- Maintain the arc length short
- Use a weave
Setting up your machine for this position must be in low amperage settings. There is no specific range since welding machines operate differently. Amperage ranging between 110-120amp is ideal for a 1/8 E 7018. Equally, 85-95amps is ideal for the 3/32 rod. Finally, ensure there is enough heat to keep the rod from sticking.
You run the rod forehand when moving vertically instead of dragging. The angle you keep sets this type of welding different from others. The rod should be pointed to a maximum of 45 degrees upwards. Going past that will yield porosity and loss of shielding. Also, keep the arc length short but not to the point of getting a convex weld. When welding with 7018 rods, it should be slightly longer for quality and smooth joints.
Finally, the 7018 electrode performs better in a slight side-to-side motion while advancing forward. Don’t pause as this creates lumps. So this rules out whipping the electrode. You need to master doing a tight motion with the 7018 rodes. Once you master that, you can learn to weld at the right angle while dragging uphill.
Horizontal welding
This type of welding position is mostly used for groove joints. The position has got two basic forms depending on the weld used. In a fillet weld, the welding is created on the upper position of a fairly horizontal surface against a nearly vertical plane. For groove weld, the pipe axis is nearly horizontal and the face of the joint in a vertical angle. The position requires more skills as compared to flat weld. The reason for this is that the molten puddle may fall on the lower side of a joint thereby causing heat on the upper side.
Conclusion
The general guidelines for welding are weaving for vertical up and down. Whip when making the first pass in thick and wider materials as well as when welding thin metal. Have the right electrodes and set your machines at the right amperage for quality welds.
